
Blog
Why Is Your Moka Pot Sputtering? Causes and Easy Fixes
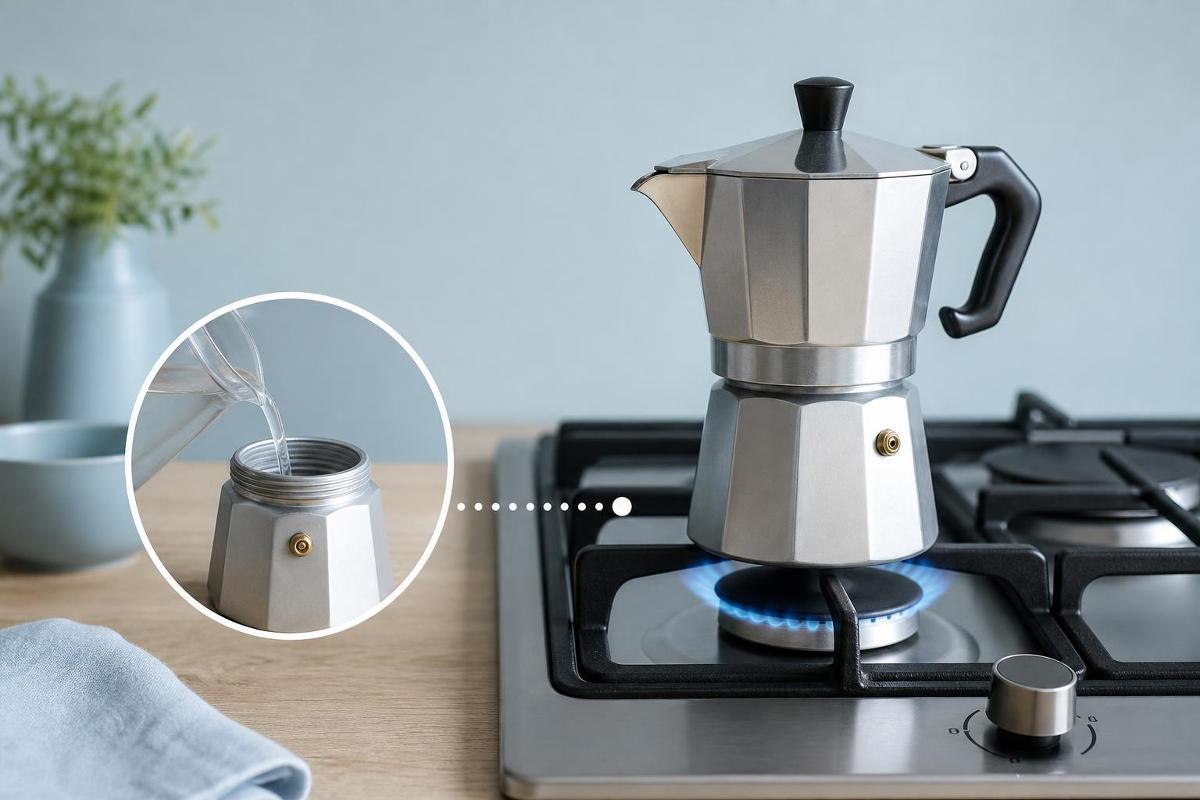
Learn why your moka pot sputters and how grind size, water level, heat and worn parts can affect the brew. Follow simple checks for a steadier cup.
A moka pot should brew with a steady, gentle flow. If it spits, spurts or gurgles loudly, the cause is often a mismatch between the grind, the fill level and the heat. Work through these checks to identify the problem and make your next cup more consistent.
Why does a moka pot sputter?
A moka pot works by heating water in its lower chamber. The resulting pressure pushes hot water up through the coffee basket and into the upper chamber. Sputtering can happen when that flow becomes uneven, or when brewing reaches its end and steam begins to escape.
A little gurgling near the end is usually normal. Persistent spluttering from the start, coffee escaping around the join, or a brew that tastes burnt or unusually weak is worth investigating. Common causes include:
- Coffee that is ground too finely or packed too firmly, slowing the water’s passage.
- Too much or too little water in the lower chamber.
- An unevenly filled basket, or grounds on the rim preventing a good seal.
- A worn or dirty gasket, filter plate or safety valve.
- Heat that is too high, causing the brew to rush.
A moka pot is not designed to produce the same pressure or texture as an espresso machine. Its brew should be concentrated and full-bodied, but it should not need to be forced through a tightly packed bed of coffee.
Explore the related selection here: Coffee beans.
How to stop moka pot coffee sputtering: a step-by-step check
Change one thing at a time so you can tell what has helped. Before handling the pot, remember that its metal body, handle and contents can become very hot. Use an oven glove or cloth, and let the pot cool before taking it apart.
1. Check when the sputtering starts. A few gurgles as the chamber fills may be normal. If it sputters throughout, focus first on the grind, basket and heat.
2. Turn off the heat when the coffee begins to lighten. The final sputtering often means the water is nearly used up.
3. Inspect the basket. It should be filled level with coffee, without tamping or pressing it down.
4. Check the water level. Keep it below the safety valve and follow the guidance for your pot.
5. Look at the seal and filter. Clear away grounds, and check for damage or a loose fit.
6. Try a lower heat setting. A slower, steadier brew is easier to control.
7. Clean the pot once it has cooled. Old coffee residue or blocked openings can affect the flow.
If the coffee leaks from the centre join rather than coming through the spout, stop the brew and allow the pot to cool before checking the gasket and how the chambers fit together.
Use the right grind and fill the basket correctly
Moka pot grind size is important. Coffee that is too fine can restrict the flow, while an overly coarse grind may produce a weak or thin-tasting brew. Aim for a fine-to-medium grind, a little coarser than espresso. The grounds should feel finer than those used for a typical filter brew, but should not be powdery.
If you buy pre-ground coffee, look for a grind described as suitable for moka pots or stovetop coffee makers. If you grind at home, make small adjustments. If the brew struggles to rise or sputters early, try a slightly coarser setting. If it flows very quickly and tastes weak, try a little finer.
Fill the basket loosely and level the coffee with a finger or the back of a spoon. Do not tamp it down. Pressing the grounds creates resistance, which can disrupt the flow and place unnecessary pressure on the pot. Avoid overfilling the basket, too: the coffee should not sit above its rim or obstruct the filter plate when the pot is assembled.
For a fair test, use the basket supplied with your pot and fill it to its intended capacity. Moka pots are made in different sizes, and using a smaller amount of coffee in a larger basket can make it harder to get a consistent result.
Check the water level, seal and filter
The correct moka pot water level is below the safety valve, not above it. The valve is a safety feature, and covering it can interfere with its function. If your pot has a marked fill line or its instructions specify a level, follow that guidance. Do not add water to the coffee basket; the water belongs in the lower chamber.
A good seal matters as well. The upper and lower chambers need to screw together securely, with the gasket sitting flat. Before assembling the pot, wipe coffee grounds from the basket rim and the sealing surfaces. A stray grain can stop the gasket from meeting the metal evenly, allowing steam or coffee to escape at the join.
The filter plate—the perforated disc held beneath the gasket—should sit flat and have clear holes. If it is bent, damaged or clogged, the brew may not flow as it should. Check the safety valve visually, too. If it appears blocked or damaged, do not try to force the pot to brew; consult the maker’s care instructions or arrange a suitable replacement part.
A moka pot gasket is usually replaceable. If the existing one is cracked, hard, misshapen or no longer seals reliably, find a replacement made for your pot’s model and size. A gasket that is the wrong size may not fit securely.
Lower the heat and watch the brew
A high flame or hob setting can make a moka pot brew too aggressively. It can also heat the handle, particularly if a gas flame extends beyond the base. Set the pot on a burner that matches its base, with the flame or heat source kept beneath it, and begin on a low-to-medium setting. Induction hobs may need a compatible base or adapter, depending on the pot.
Stay nearby once the coffee starts to emerge. A steady, controlled flow is easier to manage than a sudden rush. When the stream becomes pale and the pot starts to gurgle, remove it from the heat. The remaining water is very hot, and continuing to heat the pot can add harsh-tasting coffee and more steam to the brew.
Some people use preheated water in the lower chamber to shorten the time the assembled pot spends on the hob. This can be a useful technique, but it is not essential. If you try it, handle the lower chamber carefully with a cloth or oven glove, as it will be hot when you assemble the pot. If you are new to moka pots, start with the method in the manufacturer’s instructions and focus on controlling the heat.
Explore the related selection here: Italian coffee.
How to clean and maintain your moka pot
Let the pot cool before taking it apart. Empty the used grounds, rinse the parts and dry them thoroughly before storing. This routine helps prevent old coffee oils and residue from building up and affecting the taste.
For regular cleaning, warm water and a soft cloth or sponge are generally a sensible starting point. Avoid abrasive pads that could scratch the surface, and check the manufacturer’s instructions before using detergent or placing any component in a dishwasher. Moka pots vary by material and design, so care recommendations may differ.
Pay particular attention to the basket holes, filter plate, gasket and safety valve. Clear away visible coffee grounds, but do not poke at the valve with a sharp tool or dismantle it unless the maker’s instructions allow it. If parts remain blocked after normal cleaning, consult the manufacturer rather than forcing them.
Periodically inspect the gasket and filter plate for wear, distortion or damage. Replacing a worn seal with the correct part can resolve leaks that cleaning alone will not fix. Keep the pot dry between uses and, when storing it, avoid tightening the chambers together if that would leave the gasket compressed for long periods.
When sputtering is normal—and when to investigate
A brief gurgle at the end of brewing is part of how many moka pots sound as the water in the lower chamber runs low. The useful distinction is timing and behaviour: a short change in sound as the coffee finishes is different from continuous, forceful sputtering or steam escaping around the pot’s join.
Investigate if you notice:
- Coffee or steam leaking from the join between the chambers.
- A basket that seems blocked or a brew that repeatedly struggles to rise.
- Sputtering from the beginning, rather than just at the end.
- A damaged gasket, loose filter plate or obstructed safety valve.
- A sudden change in how the pot brews despite using the same coffee and method.
If the pot leaks, stop heating it and let it cool before opening it. Do not try to tighten or dismantle a hot moka pot. If the safety valve looks damaged or the pot still will not seal after the parts are clean and correctly assembled, follow the maker’s advice before using it again.
Choosing coffee for a smoother moka pot brew
Coffee for moka pot brewing is often sold specifically for stovetop use, making it a straightforward option if you are unsure where to start. A suitable grind can save time and reduce one common cause of uneven flow. If choosing whole beans, make sure you can grind them to a fine-to-medium texture and adjust the setting to suit your pot.
You can also choose by flavour:
- Medium roasts can give a balanced, rounded cup and are a useful starting point.
- Darker roasts tend to have a more pronounced, bold character, which some drinkers prefer in a concentrated brew.
- Lighter roasts may taste brighter or more delicate; grind and heat adjustments can help bring out their character without rushing the brew.
Beans from different origins and blends vary in flavour, so there is no single coffee that suits every palate. Look for clear information about the roast and grind, and choose a bag that matches how you like your coffee. Freshly ground beans can offer more control over grind size, while ready-ground coffee is convenient when it is labelled for moka pots.
For a smoother brew, begin with a coffee and grind intended for stovetop use, fill the basket without pressing the grounds, keep the water below the safety valve and use gentle heat. If sputtering continues, check the seal and filter before changing several things at once. A careful rinse after each use and a quick inspection of the gasket will help you spot small issues early.